News
Bakuchiol vs. Retinoids: Which one is best for your skin? July 20, 2023 09:53

Bakuchiol is the new kid on the block in the world of skincare, but this plant-based ingredient has actually been around for centuries. Derived from the seeds and leaves of the babchi plant, which is native to India, bakuchiol has a long history of use in traditional Ayurvedic medicine.
If you're wondering what in the world Ayurveda is, don't worry, you're not alone. Ayurveda is a system of medicine that originated in India thousands of years ago, and it focuses on achieving balance and harmony in the body through a combination of diet, lifestyle, and herbal remedies.
Anyway, back to bakuchiol. The babchi plant has been used in Ayurvedic medicine for centuries to treat a variety of ailments, including skin conditions like psoriasis and eczema. The seeds and leaves of the plant contain a compound called bakuchiol, which is believed to have anti-inflammatory, antimicrobial, and antioxidant properties.
Now, let's fast-forward to the present day. Skincare companies have caught wind of bakuchiol's potential benefits, and you can now find it in a variety of products, including serums, moisturizers, and masks. But what exactly are the benefits of bakuchiol, and why should you consider adding it to your skincare routine? Let's break it down:
Benefits of Bakuchiol:

- Reduces the appearance of fine lines and wrinkles: Bakuchiol has been shown to increase collagen production in the skin, which can help to reduce the appearance of fine lines and wrinkles over time. And unlike some other anti-aging ingredients (cough, retinoids, cough), bakuchiol is generally considered to be gentler on the skin and less likely to cause irritation or sensitivity.
- Improves skin texture and tone: Bakuchiol has antioxidant and anti-inflammatory properties, which can help to protect the skin from damage caused by free radicals and environmental stressors. Some studies have suggested that bakuchiol may be particularly effective at reducing the appearance of hyperpigmentation and improving skin texture and tone.
- Helps to treat acne-prone skin: Bakuchiol has been shown to have antimicrobial properties, which means it may be able to help kill off the bacteria that cause acne. This makes it a promising ingredient for those with acne-prone skin.
- Is gentle on sensitive skin: As we've already mentioned, bakuchiol is generally considered to be gentler on the skin than some other anti-aging ingredients, such as retinoids. This makes it a great option for those with sensitive skin who want to reap the benefits of an anti-aging ingredient without the irritation and sensitivity that can sometimes come with retinoids.
- Is vegan and cruelty-free: If you're someone who values ethical and sustainable skincare options, you'll be pleased to know that bakuchiol is a vegan and cruelty-free ingredient. It's derived from plants, not animals, and it hasn't been tested on animals.
So there you have it, folks - bakuchiol is a pretty impressive ingredient. But how exactly does it work, and why is it so effective at reducing the appearance of fine lines and wrinkles? Well, it turns out that bakuchiol works in a similar way to retinoids, but without some of the potential downsides.
RETINOIDS

Retinoids are a type of vitamin A that are often used in skincare products to reduce the appearance of fine lines and wrinkles. They work by increasing cell turnover in the skin, which helps to reveal fresh, new skin cells and reduce the appearance of fine lines and wrinkles. However, retinoids can also be quite harsh on the skin, and they can cause redness, peeling, and sensitivity, especially if you're just starting out with them. Also, long term use of retinols can possibly cause thinning of the skin, the jury is still out on this but I thought it was worth mentioning.
Bakuchiol, on the other hand, is believed to work by increasing collagen production in the skin. Collagen is a protein that gives our skin its structure and elasticity, but as we age, our bodies produce less collagen, which can lead to the appearance of fine lines and wrinkles. By increasing collagen production, bakuchiol can help to reduce the appearance of fine lines and wrinkles and improve the overall texture and tone of the skin. Another great way to naturally increase collagen production is by getting enough vitamin C. https://www.ncbi.nlm.nih.gov/pmc/articles/PMC6204628/
But here's the kicker - bakuchiol is generally considered to be gentler on the skin than retinoids. This means that you can get the anti-aging benefits of an ingredient like retinol without the potential downsides, such as irritation and sensitivity.
Of course, as with any skincare ingredient, it's important to patch-test bakuchiol on a small area of skin before applying it all over your face. But overall, bakuchiol is considered to be a safe and effective ingredient for most skin types.
So, if you're looking for a plant-based, gentle alternative to retinoids, bakuchiol might just be the ingredient for you. Not only does it have anti-aging benefits, but it can also help to improve the overall texture and tone of the skin, making it a great all-around skincare ingredient.
In conclusion, bakuchiol may be a new ingredient in the skincare world, but its use dates back centuries in Ayurvedic medicine. Derived from the babchi plant, bakuchiol has a range of potential benefits, from reducing the appearance of fine lines and wrinkles to improving skin texture and tone. And best of all, it's generally considered to be gentler on the skin than some other anti-aging ingredients, such as retinoids. So if you're looking for a plant-based, effective ingredient to add to your skincare routine, bakuchiol is definitely worth considering.

Rice Water: The Secret Sauce for Glowing Skin! July 20, 2023 09:49

Hey there, skincare junkies! Today, we're about to spill the tea (or should I say rice water?) on an age-old beauty secret: rice water. Yes, you heard it right! This humble kitchen staple has some surprising benefits for your skin. So, put on your chef's hat and get ready to uncover the magic of rice water. Trust me, your skin will be cooking up some serious glow!
Rice Water - From Pot to Potion
Who knew that the liquid left behind after cooking rice could be a game-changer for your skin? Well, rice water is here to prove that even kitchen mishaps can have a silver lining. It's like turning leftovers into a gourmet meal for your skin! So, next time you cook rice, don't let that precious elixir go down the drain. Instead, save it and let the magic of rice water work wonders on your complexion.
Hydration Sensation
Is your skin as thirsty as a desert wanderer? Well, rice water is about to quench that thirst! It's like a tall glass of water for your skin, providing intense hydration and moisture. Think of it as a refreshing splash on a hot summer day, leaving your skin plump, dewy, and oh-so-radiant. Say goodbye to dryness and hello to a complexion that's hydrated to perfection!
Bye-Bye, Dullness!
If your skin is looking as lackluster as a Monday morning, rice water is here to bring back the glow! Its natural brightening properties are like a ray of sunshine, illuminating your skin and giving it a healthy, youthful radiance. It's like a magical highlighter that works from within, banishing dullness and bringing out your natural beauty. Get ready to shine like a diamond!
Soothing Symphony
Has your skin been throwing a tantrum lately, with redness and irritation taking center stage? Well, rice water is the ultimate peacemaker! It has soothing and calming properties that gently quiet down your skin's protests. It's like a soft lullaby, coaxing your skin back into a state of serenity. Say goodbye to redness and hello to a complexion that's as calm as a zen garden.
Pore Patrol
We all have those pesky pores that like to steal the show on our faces. But fear not, because rice water is here to tighten the ranks! Its astringent properties help to minimize the appearance of pores, leaving your skin looking smooth and refined. It's like a little army, marching in to keep your pores in check. Say goodbye to visible pores and hello to a complexion that's as flawless as can be!
Age-Defying Magic
Worried about the signs of aging creeping up on your skin? Well, rice water is the ultimate secret weapon in the fight against time! It's packed with antioxidants that help to neutralize free radicals, those pesky little troublemakers that accelerate aging. It's like a superhero, protecting your skin and keeping those wrinkles and fine lines at bay. Embrace the rice water revolution and say hello to a complexion that defies age!
There you have it, beauty enthusiasts! Rice water, the secret sauce for glowing skin, is ready to revolutionize your skincare routine. It hydrates, brightens, soothes, tightens, and helps fight signs of aging. So, don't let that rice water go to waste anymore! Let its magic work wonders on your complexion and prepare for compliments that will make you blush.

Rice Water Toner Recipe:
Ingredients:
- 1/2 cup uncooked rice (preferably organic)
- 1 cup water
Instructions:
- Start by rinsing the uncooked rice under running water to remove any impurities.
- Place the rinsed rice in a bowl and add the water. Let it sit for about 15-30 minutes to allow the rice to release its beneficial properties into the water.
- Gently swirl the rice in the water with your fingers for a few minutes. This will help to further extract the nutrients.
- Strain the rice water into a clean container, discarding the rice grains.
- Wait for it to cool to room temperature!!
- Your rice water toner is now ready to use!
How to use:
- Cleanse your face with a gentle cleanser and pat dry.
- Take a cotton pad or a clean washcloth and soak it in the rice water toner.
- Gently apply the toner all over your face, avoiding the eye area.
- Allow the toner to air dry on your skin, or you can lightly pat it into your skin using your fingertips.
- Follow up with your favorite moisturizer or serum.
Tips:
- You can store the rice water toner in the refrigerator for up to one week. Just make sure to give it a good shake before each use.
- If you have sensitive skin, you can dilute the rice water with a little more water before applying it to your face.
- Feel free to customize your rice water toner by adding a few drops of your favorite essential oil for added benefits and a pleasant aroma.
Remember, everyone's skin is unique, so it's always a good idea to patch test the toner on a small area of your skin before using it all over your face. Enjoy the natural goodness of rice water and let your skin soak up its amazing benefits!

Evening Primrose Oil: Your Skin's Natural Beauty Tonic! July 20, 2023 09:45

Hey there, my beauties! Today, we're diving into the wonderful world of evening primrose oil and its incredible benefits for your skin. This natural beauty tonic has been gaining popularity in the skincare realm, and for good reason. So, grab a cup of tea and get ready to discover the wonders of evening primrose oil. Your skin will thank you for applying this botanical treasure!
Hello, Hydration!
Is your skin feeling as dry as the Sahara desert? Have no fear, because evening primrose oil is here to quench its thirst! This magical elixir is like a tall glass of water for your skin, providing deep hydration and nourishment. It's like a refreshing splash, leaving your complexion plump and radiant. Say goodbye to dry patches and hello to a complexion that's as smooth as silk!
Fight the Signs of Aging
We all want to maintain our youthful glow, right? Well, evening primrose oil is here to turn back the clock! With its rich content of essential fatty acids, it helps to improve skin elasticity and reduce the appearance of fine lines and wrinkles. It's like a time machine in a bottle, rejuvenating your skin and leaving it looking younger and fresher. Embrace the fountain of youth and say hello to a complexion that defies age!
Goodbye Skin Woes
Sometimes, our skin can be a little temperamental, with blemishes, redness, and inflammation taking center stage. But fear not, because evening primrose oil is here to save the day! Its anti-inflammatory properties calm down the skin, like a soothing balm on a sunburn. It's like a superhero, fighting off acne and reducing redness, leaving your skin clear and calm. Say goodbye to skin woes and hello to a complexion that's happy and healthy!
Smooth and Supple Skin
Who doesn't want skin that's as smooth as a baby's bottom? Well, evening primrose oil is the key to unlocking that dream! It contains gamma-linolenic acid, which helps to improve skin texture and tone. It's like a magic potion, softening your skin and leaving it feeling supple and velvety. Say goodbye to rough patches and hello to a complexion that's as smooth as can be!
The Ultimate Skin Shield
In a world full of environmental stressors, our skin needs a shield of protection. And evening primrose oil is here to be that guardian angel! It's packed with antioxidants that help to defend your skin against free radicals and environmental damage. It's like a force field, keeping your skin healthy and radiant. Embrace the power of antioxidants and say hello to a complexion that's glowing with vitality!
Now you know!
There you have it, beauty enthusiasts! Evening primrose oil, your skin's natural beauty elixir, is here to revolutionize your skincare routine. It hydrates, fights the signs of aging, calms skin woes, smooths your complexion, and provides antioxidant protection. So, embrace the botanical treasure and let your skin reap the benefits of evening primrose oil. Get ready to say goodbye to dryness, wrinkles, and skin troubles, and hello to a complexion that's nourished, youthful, and absolutely radiant. Your skin will thank you for this natural beauty boost!
MY TOP PICK FOR EVENING PRIMROSE OIL AS A SOLO OIL
Heavenly Botanicals Best seller and My Favorite Blemish Buster featuring Evening primrose oil
Witch Hazel: The Skin Savior You Need! July 20, 2023 09:42

Hey there, skincare enthusiasts! Today, we're delving into the marvelous world of witch hazel. So grab your skincare stash and get ready to discover the fantastic benefits of witch hazel. This ancient skin soothing wonder will wow you with all its benefits!
Soothe and Calm Your Skin
Imagine this: Your skin is red and irritated, feeling as sensitive as a balloon at a cactus convention. But fear not, because witch hazel is here to save the day. With its soothing properties, it gently calms your skin, reducing redness and inflammation. It's like a soothing balm that says, "There, there, skin, it'll be alright." Embrace the tranquility and say hello to a calm and happy complexion.
Minimize Those Pores
Pores, those little pesky openings on your skin, can feel like craters on the moon. But fret not, my friend, because witch hazel is here to work its magic! It has the incredible power to tighten and minimize your pores, leaving your skin looking smooth and refined. You'll feel like you've just had a luxurious spa treatment. Say goodbye to visible pores and hello to a flawless canvas.
Banish Excess Oil
If your skin feels like an oil slick, it's time to call upon the powers of witch hazel. It acts as an oil controller, helping to regulate your skin's sebum production. No more shiny face that could blind an astronaut! Witch hazel swoops in like a hero to restore balance and leave your skin looking fresh and matte. Say farewell to the grease and hello to a shine-free complexion.
Fight Off Those Unwanted Blemishes
Ah, pesky blemishes, the uninvited guests on our skin's party. But worry not, because witch hazel is the ultimate fighter against those unwelcome visitors. With its natural astringent properties, it helps to eliminate blemishes and reduce their appearance. It's like a superhero that zaps away the villains on your skin. Bid farewell to breakouts and embrace a clear and confident complexion.
Soothe and Refresh Your Skin
Sometimes our skin just needs a little TLC, and witch hazel is here to provide it. It has remarkable anti-inflammatory properties that soothe irritation and refresh your skin. It's like a cool breeze on a hot summer day, instantly revitalizing and rejuvenating your complexion. Say goodbye to skin tantrums and hello to a peaceful and revitalized visage.
Now you know!
There you have it, skincare enthusiasts! Witch hazel, the skin savior you've been searching for, is here to rescue your troubled skin. It soothes, minimizes pores, controls oil, and fights blemishes like a champ. With its gentle yet effective powers, you'll have a complexion that's calm, smooth, and blemish-free. Embrace the magic of witch hazel and unlock the secret to your best skin. Get ready to say goodbye to skin woes and hello to a radiant and confident you!
Here at Heavenly Botanicals we make our own witch hazel, with wild harvested dried bark, purified water, Organic Alcohol for a preservative and lots of love! Feel free to check out our best selling Witch Hazel based toners below


Vitamin C: The Superstar of Skincare! July 20, 2023 09:39

Hey, beauty enthusiasts! Today, we're going to shed some light on a skincare ingredient that's like a ray of sunshine for your skin - vitamin C! This powerful little nutrient has been stealing the spotlight in the beauty world, and for good reason. So grab your sunglasses and get ready to discover the incredible benefits of vitamin C for your skin. Trust me, you'll be glowing in no time!
Radiant Skin, Coming Right Up!
Picture this: Your skin is feeling dull and lackluster, like a wilted flower in desperate need of a pick-me-up. Well, fear not! Vitamin C is here to save the day. With its brightening properties, it's like a shot of espresso for your skin, giving it a vibrant and radiant boost. Say goodbye to the blahs and hello to a complexion that shines brighter than a disco ball!
Age-Defying Magic
We all want to age like fine wine, but sometimes our skin needs a little extra help. That's where vitamin C swoops in like a superhero! Its powerful antioxidants work tirelessly to combat those pesky free radicals, the villains responsible for premature aging. It's like a time machine in a bottle, reducing the appearance of fine lines and wrinkles, and leaving your skin looking plump and youthful. Embrace the magic and say hello to a more youthful and vibrant you!
Bye-Bye, Sun Damage
We love soaking up the sun, but it can leave its mark on our skin. Enter vitamin C, the ultimate sun damage warrior! It works wonders in fading those pesky dark spots and hyperpigmentation caused by excessive sun exposure. It's like a magic eraser, gently lightening those spots and giving your skin an even-toned appearance. Wave goodbye to sun damage and embrace a more uniform and flawless complexion.
Collagen Booster Extraordinaire
Collagen, the holy grail of youthful skin, tends to diminish as we age. But fear not, because vitamin C is here to save the day yet again! It plays a crucial role in collagen synthesis, keeping your skin plump and firm. It's like a personal trainer for your skin cells, giving them the nutrients they need to stay strong and resilient. Say hello to bouncy, baby-soft skin that defies gravity!
Skin's Shield Against Pollution
In this modern age, our skin faces a constant battle against environmental pollutants. But worry not, because vitamin C acts as a shield, protecting your skin from the harmful effects of pollution. It's like a force field that neutralizes those nasty free radicals and prevents them from wreaking havoc on your skin. Step out into the world with confidence, knowing that your skin is protected and ready to take on anything!
NOW YOU KNOW!
There you have it, folks! Vitamin C, the superstar of skincare, is here to transform your skin from drab to fab. It brightens, fights signs of aging, fades sun damage, boosts collagen, and protects against pollution. It's like a one-stop shop for all your skincare needs! So grab those vitamin C-infused products and let the magic unfold. Get ready to say hello to a radiant, youthful, and resilient complexion. Your skin will thank you for this superstar treatment!

Here's a simple recipe for a homemade Vitamin C serum:
Ingredients:
- 1 teaspoon Vitamin C powder (L-ascorbic acid, I like this one https://amzn.to/3NTkIAT
- 1 tablespoon distilled water
- 1 teaspoon vegetable glycerin, I like this one https://amzn.to/43cr9Ds
- 1/2 teaspoon Vitamin E oil, I like this one https://amzn.to/3rgq8gf
- 2-3 drops of your favorite essential oil (optional for fragrance) If you're going for anti-aging effects then reach for either yarrow, frankincense, or Rose. This is one of my favorite brands https://amzn.to/44cqK5h
Instructions:
- In a small glass bowl, combine the Vitamin C powder and distilled water. Stir well until the powder is completely dissolved.
- Add the vegetable glycerin and Vitamin E oil to the mixture. Mix thoroughly to combine all the ingredients.
- If desired, add a few drops of your favorite essential oil for a pleasant scent. Stir well to incorporate the essential oil.
- Transfer the mixture into a dark glass dropper bottle. Dark glass helps protect the serum from light and extends its shelf life.
- Your homemade Vitamin C serum is ready to use!
How to use:
- Cleanse your face with a gentle cleanser and pat dry.
- Apply a few drops of the serum onto your fingertips.
- Gently massage the serum into your face and neck, avoiding the eye area.
- Allow the serum to absorb into your skin for a few minutes.
- Follow up with your regular moisturizer or sunscreen.
Tips:
- It's important to store the serum in a cool, dark place, away from direct sunlight. Vitamin C can degrade when exposed to light and air.
- You can adjust the concentration of the serum by adding more or less Vitamin C powder. Start with a lower concentration and gradually increase it if your skin tolerates it well.
- If you have sensitive skin, you may want to do a patch test before applying the serum to your entire face.
- It's best to use the serum within 1-2 weeks to ensure maximum potency. After that, the Vitamin C may start to lose its effectiveness.
Remember, homemade Vitamin C serums may not have the same stability and potency as commercial formulations. Vitamin C oxidizes very quickly so this serum will only last a couple days, so make as much as you can use in that time. Enjoy the benefits of your homemade Vitamin C serum and let your skin glow!
If you're not into making your own serum, we offer a Niacinamide serum with Vitamin C that helps fight the signs of aging

Hyaluronic Acid: The Skin's BFF (Best Friend Forever)! July 20, 2023 09:36

Hey there, skincare junkies! Today, we're diving into the wonderful world of hyaluronic acid, the ultimate best friend for your skin. This powerhouse ingredient has been stealing the spotlight in the beauty industry, and for good reason. So sit back, relax, and let's explore the incredible benefits of hyaluronic acid in skincare. Get ready to fall in love with this skin-loving superhero!
Quench Your Skin's Thirst
Imagine this: Your skin feels as parched as a desert in the scorching sun. It's tight, dry, and in desperate need of hydration. No worries, because hyaluronic acid is here to save the day! This moisture magnet has the incredible ability to hold up to 1000 times its weight in water! WHOA! It's like a tall glass of ice-cold lemonade for your skin, quenching its thirst and leaving it plump and revitalized. Say goodbye to dryness and hello to a hydrated and dewy complexion!
Smooth Operator
Smooth, supple skin is the dream, and hyaluronic acid is the key to unlocking it. This magical ingredient has a knack for plumping up the skin, reducing the appearance of fine lines and wrinkles. It's like a magic wand, erasing those pesky signs of aging and leaving your skin looking and feeling silky smooth. Embrace the power of hyaluronic acid and say hello to a complexion as smooth as a baby's bottom!
Bye-Bye, Dullness
Dull, lackluster skin is a thing of the past when hyaluronic acid enters the scene. It's like a brightening superstar, giving your skin a healthy and radiant glow. Say goodbye to the blahs and hello to a complexion that shines brighter than a disco ball! With hyaluronic acid on your side, you'll be strutting around with the confidence of a Hollywood starlet on the red carpet.
The Ultimate Skin Plumper
Loss of volume and sagging skin got you feeling down? Fear not, because hyaluronic acid is the ultimate skin plumper. It's like a magic cushion that fills in the gaps and gives your skin that youthful bounce. It restores lost volume, firms up sagging areas, and leaves your skin looking revitalized and lifted. Say goodbye to the droop and hello to a face that defies gravity!
Gentle Hydration for All
One of the best things about hyaluronic acid is that it's suitable for all skin types. Whether you have dry, oily, or sensitive skin, this superhero ingredient is here to save the day. It's like a gentle embrace for your skin, providing hydration without weighing it down or clogging pores. Embrace the versatility and inclusivity of hyaluronic acid, knowing that it's there to support your skin, no matter its needs.
NOW YOU KNOW!
There you have it, beauty enthusiasts! Hyaluronic acid, the skin's BFF, is a game-changer in the world of skincare. It hydrates, plumps, brightens, and nourishes your skin, giving you that coveted healthy and youthful glow. So go ahead and embrace this skincare superhero. Your skin will thank you for the hydration, radiance, and rejuvenation that hyaluronic acid brings. Get ready to say hello to a complexion that's smooth, plump, and absolutely fabulous!
Here's a simple recipe for a homemade Hyaluronic Acid serum:
Ingredients:
- 1/2 teaspoon hyaluronic acid powder I love this one https://amzn.to/3XvprvT
- 1/4 cup distilled water
- 1/4 teaspoon vegetable glycerin I love this one https://amzn.to/3NUSp4S
- 1/4 teaspoon aloe vera gel (optional) I love this one https://amzn.to/3NVmSzX
- 1/4 teaspoon Vitamin E oil (optional) I love this one https://amzn.to/437Xawn
Instructions:
- In a clean, (preferably sterilized with 70% isopropyl alcohol), small glass container, combine the hyaluronic acid powder and distilled water. Stir well until the powder is completely dissolved.
- Add the vegetable glycerin to the mixture and stir to incorporate.
- If desired, you can also add the aloe vera gel and Vitamin E oil to the mixture. These ingredients provide additional hydration and nourishment to the serum.
- Stir all the ingredients together until well combined.
- Transfer the mixture into a dark glass dropper bottle for storage. Dark glass helps protect the serum from light and extends its shelf life. Though this product will only last a week at most stored in the fridge!!!
- Your homemade Hyaluronic Acid serum is ready to use!
How to use:
- Cleanse your face with a gentle cleanser and pat dry.
- Apply a few drops of the serum onto your fingertips.
- Gently massage the serum into your face and neck, focusing on areas that need extra hydration.
- Allow the serum to absorb into your skin for a few minutes.
- Follow up with your regular moisturizer or sunscreen.
Tips:
- It's important to store the serum in a cool, dark place, away from direct sunlight. Hyaluronic acid can degrade when exposed to light and air.
- You can customize the serum by adding a few drops of your favorite essential oil for a pleasant scent or additional skin benefits.
- It's best to use the serum within 1-2 weeks to ensure maximum potency. After that, the hyaluronic acid may start to lose its effectiveness.
Please note that homemade Hyaluronic Acid serums may not have the same concentration and stability as commercial formulations. Enjoy the hydrating benefits of your homemade Hyaluronic Acid serum and let your skin feel plump and nourished!
How To Make Your Own Soap At Home! April 17, 2023 13:30

Alright, buckle up folks, because we're about to embark on a sudsy adventure into the world of soap-making! Making soap from scratch may seem like a daunting task, but fear not, dear reader, because with a little know-how and some elbow grease, you'll be well on your way to crafting your own lather-filled masterpieces.
WHAT YOU'LL NEED
First things first, let's talk about the ingredients you'll need. Soap-making requires just a few basic ingredients: oils or fats, lye, and water. Now, before you start getting all squeamish about the lye, let me assure you that it's safe as long as you follow some safety precautions. Lye is a caustic substance that can cause serious burns, so it's important to wear gloves and eye protection when handling it. You'll also want to mix the lye outside or in a well-ventilated area, because the fumes can be pretty potent.
MIXING LYE, BE CAREFUL!
READ CAREFULLY, EXTREMELY IMPORTANT!!!!
When mixing lye, it's important to use a container that is made of a material that can withstand the caustic nature of the lye. You should never use aluminum, tin, or any other reactive metal container, as the lye will react with these metals and cause a dangerous chemical reaction.
Instead, you should use a container made of plastic, stainless steel, or heat-resistant glass, such as Pyrex. It's also a good idea to use a container with a lid or cover to prevent any accidental spills or splashes.
When choosing a container, make sure it's large enough to accommodate the amount of lye and water you'll be mixing, but not so large that the mixture will be too shallow. A container with a spout or pour spout can also be helpful for pouring the lye mixture into the oils. These are good for measuring https://amzn.to/3ULLiO3
Overall, safety should be the top priority when choosing a container for mixing lye, so be sure to use a container that is appropriate for this purpose and follow all safety precautions.
I recommend this lye for beginners.
OILS AND BUTTERS
Now, onto the oils and fats. You can use a variety of oils and fats to make soap, including olive oil, coconut oil, shea butter, and even bacon fat (yes, you read that right). Each oil and fat has its own unique properties that will affect the final product, so it's important to do a little research and choose the ones that will give you the desired result. For example, olive oil will give you a mild, moisturizing soap, while coconut oil will create a harder, more cleansing bar.
Here's a short list to get you started and thinking about what oils you might want to use:
- Olive oil: Creates a mild, moisturizing soap that's great for sensitive skin.
- Coconut oil: Produces a hard, cleansing bar with a fluffy lather.
- Palm oil: Adds firmness to the soap and creates a long-lasting bar.
- Castor oil: Boosts lather and moisturizes the skin.
- Shea butter: Provides extra moisture and nourishment to the skin.
- Cocoa butter: Adds firmness and a rich, creamy texture to the soap.
- Jojoba oil: Helps regulate oil production in the skin and has anti-inflammatory properties.
- Almond oil: Moisturizes and soothes dry or irritated skin.
- Avocado oil: Contains vitamins and minerals that nourish and hydrate the skin.
- Sunflower oil: Rich in vitamin E and helps create a mild, gentle soap.
The easiest way for a beginner to calculate how much lye you need in your recipe is to visit this website http://www.soapcalc.net/calc/SoapCalcWP.asp
Just put in the weight of each oil you're using and then press calculate, so easy!
Once you've got your ingredients assembled, it's time to get down to business. The first step in making soap is to measure out your oils and fats and melt them together in a large pot over low heat. You'll want to heat the oils until they're just melted, but not so hot that they start to smoke or burn. While the oils are melting, measure out your lye and water into separate containers. A great option for measuring is with this kitchen scale . It has zero out function which is really useful when you're using a measuring cup that's hefty. You want to be very accurate when measuring, no guessing here, or your soap with fail.
Now, here comes the tricky part: you need to mix the lye and water together. But remember what I said about safety precautions? This is where they really come into play. Slowly add the LYE to the WATER, NEVER ADD WATER TO LYE, IT CAN EXPLODE! While adding the lye to water stir constantly with a stainless steel spoon or silicone spatula, and be prepared for the mixture to get very hot and release some fumes. You'll want to do this in a sink or outside, and make sure you're wearing your gloves and eye protection.
Once the lye and water are mixed together, you'll want to wait about an hour for the lye/water mixture to cool down.
HOT OR COLD PROCESS SOAP? That is the question

At this point you need to decide whether you are going to use the Hot process for your soap or the cold process.
There are two main methods for making soap: the hot process and the cold process. Each method has its own unique benefits and drawbacks, and the choice between them will depend on personal preference and the desired outcome of the soap.
Here are some of the benefits of each method:
Hot Process Soap Making:
- Faster curing time: The hot process method can speed up the curing process by several weeks, as the soap is cooked and cured at the same time.
- More control over the final product: Because the soap is heated and cooked, there is more control over the texture and consistency of the final product.
- Produces a harder bar of soap: The hot process method typically produces a harder, longer-lasting bar of soap.
Cold Process Soap Making:
- More natural and gentle: The cold process method preserves the natural glycerin in the soap, which can make it more gentle and moisturizing for the skin.
- More creative control: The cold process method allows for more creative freedom in terms of design, color, and scent.
- More cost-effective: The cold process method can be more cost-effective, as it doesn't require additional heat sources or energy to make the soap.
Overall, both the hot process and cold process methods have their own unique benefits and drawbacks, and the choice between them will depend on personal preference and the desired outcome of the soap. Some soap makers even use a combination of both methods to achieve the best of both worlds. I personally use hot process most of the time because I don't always want to wait a month to use my soap, but it really depends on the type of soap you're making and what you're looking to achieve. So it's up to you. The best method I've found for hot process soap is in a crockpot. You'll want to designate that crockpot for soap use only, don't use it for food ever again because you definitely don't want to accidentally eat soap. I've used this one for years and it's still kicking
SUPER IMPORTANT!!!! I cannot say this LOUD ENOUGH because it's so important, put your lye/water mixture somewhere out of reach of children and pets. If this mixture spills on someone or they were to drink it they would be severely damaged or they could die. So put it far out of reach and make sure not to spill it on yourself either always wear gloves when moving lye/water mixture around. I've had a lye burn when I was mixing the oils, it popped out of the crockpot I was using and hit my lip and instantly starting burning. I'm lucky it was a really small amount. Anyone who's ever had a burn from lye knows its a burn like none other.
The best temperature for mixing lye and oils in soap making is generally between 90 and 110 degrees Fahrenheit (32-43 Celsius). This temperature range helps the oils and lye to combine more easily and creates a smoother, more even soap mixture. Here's a good thermometer for getting accurate temps https://amzn.to/40hdEki
However, it's important to note that the temperatures of the oils and lye should be relatively similar when they are combined. If the oils are too cool and the lye is too hot, or vice versa, it can cause the mixture to seize or become lumpy, making it difficult to work with.
To ensure that the temperatures are consistent and within the desired range, many soap makers use a thermometer to monitor the temperatures of both the oils and the lye before mixing them together. This can help ensure that the soap making process goes smoothly and that the final product is of high quality.
Once your lye has cooled and your oil have cooled then it's time to add it to the melted oils. You'll want to pour the lye mixture into the oils slowly, (POUR LYE INTO OILS NOT THE OPPOSITE WAY) stirring constantly. Make sure you're using a pot big enough for your recipe because if you've used a container that's too small you may have a dangerous spill on your hands. This is where the magic happens: the lye and oils will start to react, and the mixture will begin to thicken and turn opaque. This is called "trace," and it's when you know your soap is on its way to becoming a solid bar. I always use an immersion blender like this one https://amzn.to/3GPrrIc to make sure it gets to trace and you don't have any issues. Again with the !!!!safety precautions!!!!! keep the immersion blender on the bottom of the pot and do not lift it up while mixing because doing so could cause lye to splatter everywhere. Therefore possibly injuring you or someone else. So hold it down firmly against the bottom of the pot, turn it on and mix slowly. NEVER TRY TO MAKE SOAP WITH CHILDREN, IT IS NOT A KID FRIENDLY ACTIVITY.
The oils and lye need to be mixed properly and completely in order to make soap.
Once your mixture has come to trace, if you're doing cold process you can mix in your essential oils you'd like to use. You can also add colorants, clays, charcoal or exfoliants like oatmeal or coffee grounds, if you'd like. Stir everything together until it's well combined, then pour the mixture into a mold. Cover with an old towel and put it in a place where it won't have to moved for at least 24 hours. I would give it a few days to cure in the mold and then unmold it, slice it, and spread them out to dry. Your soap will have to cure for about a month before you can use it. Unless you're doing hot process, read on for those instructions.

If you're going the hot process way, you can use a crockpot to essentially cook your soap. I like to leave it on low for 3-4 hours until the mixture is no longer shiny. Use your silicone spatula or long wooden spoon to mix it up a few times during those 3-4 hours. Once it's cooked, scoop it into the molds and you can leave it uncovered to cool. Leave it in a place where it doesn't have to be moved for 24 hours. You can un-mold it after 24-48 hours, start slicing it and then using it within the week!
TYPES OF MOLDS TO USE:
You can use anything from a fancy silicone mold to an old cardboard box lined with wax paper - it's up to you! My favorite molds to use are silicone. They're just so easy, the soap doesn't stick to them, they're easy to clean and you can get some really fun ones like these:
Or these https://amzn.to/3mH2IPo
Or if you want a soap loaf these are my tried and true go to
If you want to watch someone make soap here's a great video tutorial for beginners https://www.youtube.com/watch?v=VKZI7X-UIe8
You definitely want to do as much research as you need to, to be comfortable doing this for the first time. Watching other people make soap is one of the best ways to learn the ins and outs of this craft.
So there you have it, folks - your very own handmade soap! It may take a little bit of practice to get the hang of it, but once you do, you'll probably have bars and bars of soap hanging around for you and your family to enjoy!
A simple Soap Recipe to try:
This will make about 2 of those crafter's choice loafs.
OILS:
Coconut Oil 76 deg- 20 ounces, or 566.99 grams
Olive Oil- 12 ounces or 340.19 grams
Castor Oil- 10 ounces or 283.50 grams
Shea Butter- 10 ounces or 283.50 grams
Water 19.76 ounces or 560.19 grams
Lye NaOH 7.46 ounces or 211.42 grams
Essential oils: your choice 1/2 ounce, I don't use fragrance oils, because they are harmful to the skin and can cause allergies, hives, reproductive harm, endocrine harm, etc. If you want more info you can visit this site https://www.ewg.org/skindeep/ingredients/702512-FRAGRANCE/
If you want to add clay for color and more cleansing effects add approximately 1-2 TBSP
Soap weight before Cold or Hot Process cook 5.053lbs, or 80.84 ounces or 2,291.85 grams
If you put all that into the soap calc you'll be able to see all the qualities of the soap, such as, hardness, cleansing, conditioning, bubbly, creamy etc. This particular recipe is on the harder side, very conditioning, very cleansing and very bubbly.
And if all this sounds way too intense for you and you'd rather enjoy using soap someone else has made you can visit my shop
https://www.heavenly-botanicals.com


Make Acne Scars Disappear with These Natural Remedies! April 17, 2023 10:01
Make acne scars disappear with these all natural remedies! A list of my favorites...Fix Your Damaged Color treated hair! April 17, 2023 08:54

The Hair Products that Fixed My Damaged hair!

From Dark Brown to Light Blonde Yikes!
I recently dyed my hair, from dark brown to light blonde and fried my hair! Why did I do this? Because at the ripe old age of 37 I'm starting to see more and more gray hairs and I wasn't ready to go full gray. I thought I'd go gracefully into the world of gray hair by going blonde first and gradually adding more gray in. So I went to my local beauty shop, bought some bleach (the least damaging kind I could find) and went for it. I had to bleach it 3 times until it was a light blonde that wasn't orange and brassy. I did this over a period of 9 weeks with 3 weeks in between each dye. This resulted in some pretty dry, coarse hair. This is what I used https://amzn.to/3kNxDst and I was super impressed that my hair didn't just break off after 3 bleach sessions. It's honestly the best stuff I've ever used. I dyed my hair blonde for most of my young life and then in my 20's went dark brown.
Then I toned my hair color which was really orange and brassy with this https://amzn.to/3yjXdrX (see the pic of my hair at the bottom of this post, it's a lovely ash blonde). I 100% love the color!

A Word About Hair Dye
Let me mention that all hair dye is toxic, and even the "natural" ones (EXCEPT HENNA!) have PPD in them, a really nasty chemical that can possibly cause all sorts of health problems if used long term. You can learn more at EWGhttps://www.ewg.org/skindeep/ingredients/704389-PPHENYLENEDIAMINE/
Other chemicals commonly found in hair dyes:
*Resorcinol- a bleaching product https://www.ewg.org/skindeep/ingredients/705539-RESORCINOL/
*Ammonia- https://www.ewg.org/skindeep/ingredients/700353-AMMONIA/
Fragrances- https://www.ewg.org/skindeep/ingredients/702512-FRAGRANCE/
BUT! Because this is used on hair and washed off AND if done with taking the right precautions, such as, wearing proper protective clothing, putting a line of conditioner around scalp line to minimize skin contact, wearing gloves, wearing a mask, doing it outside, and wearing protective eye care you can really minimize the absorption of chemicals. You should also wash your hair off either in a sink or with your hair draped over the side of the tub under a stream of water. I would NEVER advise anyone to wash it off in the shower and let it run down your body. I once did that and got hives from head to toe and felt like I was sucking air through a straw, needless to say it was awful.
And we're back from that side bar...
Back to the story, I have this completely unmanageable, un-washable hair now. SO I start scrambling for an organic, shampoo and conditioner without synthetic fragrances, that can repair my hair. That is a crazy request in this world because it seems like every hair care product I researched had synthetic fragrances. Bad things happen to me when I use synthetic fragrances, such as, I break out in hives, or I have breathing difficulties, etc.! I tried a bunch of different products and they all either didn't work, made me break out all over my back and neck or left my hair greasy and totally gross looking. Then, I went to visit my mother, and showed her my hair. Backstory: My mother is a blonde, and has been going gray gracefully for many years. She told me about this new hair care line she was using and because her hair looked so healthy, I went home and ordered a bunch of samples from this place.
I found the Holy Grail of hair care products!
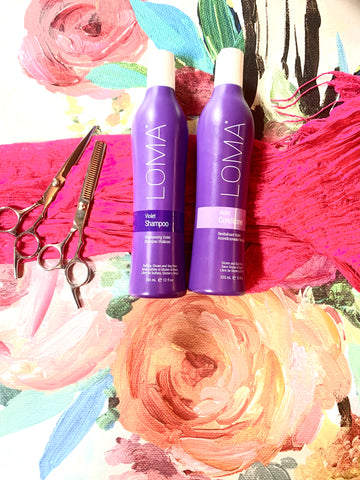
One word, Loma. Two words, Try. It. You will not be disappointed.
Here's why:
- No synthetic Fragrances
- Organic Ingredients
- Free of synthetic colors
- No formaldehyde
- Made in small batches in the USA (how rare is that!)
- Based in Ayurvedic Medicine
- Manufactured with 100% hydroelectric Power
- Organic Aloe vera based
- Vegan friendly and PETA certified
- research and test each raw material to ensure their purity
- Free of Parabens, Sodium Chloride, Soy, Gluten, and Sulfates
- Never tested on animals
- Recyclable Packaging
- ETC. ETC.


I did not edit this image at all to make my hair look less brittle or frizzy. The only products in my hair are the Violet Shampoo and Conditioner and the deep conditioner.
Disclosure: I will earn a commission on your purchase, but I would never ever recommend a product that I don't use myself and 100% love!
Loma Beauty
Is your Shampoo causing your body acne? July 24, 2018 15:39
Do you suffer from body acne? Chances are your haircare or skincare products have something to do with it.Hormonal Acne free for 5 years now! February 12, 2018 13:11
 A little bit about me: I struggled with cystic/hormonal acne for years. The big painful under the skin turn black kind 😓I went to many dermatologists and even tried the infamous accutane, nothing ever worked permanently. Then I had a baby and the cystic acne turned into monster cystic acne, it was worse than ever. Between the hormones, my eating habits and the stress of a new baby I think it just had the perfect conditions to take over.
Harmful Ingredients To Look for in Cosmetics and Foods January 30, 2016 16:17

Sourced from http://www.ewg.org/skindeep/ingredient/704811/PHENOXYETHANOL/
I have a general mistrust for "organic" store products...here's why...
Go grab an "organic" product you've recently purchased, find the ingredient list, do you see any of the following:
Hydantoin AKA DMDM- is a preservative that releases formaldehyde that is used in embalming. Found in many after sun Aloe vera products, lotions, sunscreens, etc.
Phenoxyethanol- AKA Ethylene glycol phenyl- is known to cause DNA mutations and is an endocrine(hormone) disrupter and can cause bladder damage. This product is also tested on animals so NOT vegan friendly! Another quick fact about this dirty additive is that you can find it in many shampoos and cosmetics so check your labels!!!
Germall plus- AKA Diazolidinyl Urea, Iodopropynyl Butylcarbamate and Propylene Glycol (anti-freeze) yes the kind you put in your car, Need I say more? This is a very common preservative found in many cosmetics, body washes, shampoos, etc.
FD&C colours- such as Red 40, blue 1, etc are derived from the coal tar used to make synthetic dyes, I'm pretty positive It can't be healthy to put that on your skin or in your body.
DHA AKA Dehydroacetic acid- used as a preservative and can cause kidney damage if ingested, so my question is what happens when it's absorbed through the skin?
Synthetic Fragrances- can cause allergic reactions and are very toxic to the body. They contain many chemical compounds ranging between 10-3000. Many fragrances contain Phthalate which help make plastic products. So again you're putting endocrine disrupters, carcinogenic chemicals on your body when you apply any product that has a fragrance(s) in it.
Hydroquinone- been shown to cause leukemia in mice. The European union banned it from cosmetics.
Methylparaben, and propylparaben- estrogenic (messes with natural hormone balance, too much estrogen causes estrogen dominance which can cause cancer, and many other problems for men and women), carcinogenic, allergenic, found in breast tissue.
Parrafin, mineral oil, petrolatum etc.- petrochemicals, clogs pores, acne causing, respiratory toxin, can cause dizziness
SO maybe you're starting to see why I'm a little skeptical of store bought products, many of them claiming to be organic and "good" for you.
I'm not buying it, literally.
I won't buy products with these things in them and I refuse to put them in the products I sell. If I won't put it on my skin, I'm not going to put it in my products, knowing that they're potentially harmful.
So before you buy, LOOK AT THE INGREDIENT LIST! I'm not yelling, just urging you!
You may think it doesn't make a difference because it's in such small quantities, but your skin readily absorbs what you put on it and whatever you put on it can get transferred to organs, cells, your brain etc. Think about it....
That face cream you use, everyday, that may have harmful ingredients, those little amounts of preservatives and petrochemicals in the cream can build up in your system overtime, resulting in real problems for your body.
A word about the word "Organic."
My definition is different from the commercial definition of organic, to me organic means: real whole foods, and herbs that have not been treated with synthetic fertilizers or pesticides of any kind, have been grown in soil that does not have residues from pesticides, herbicides, synthetic fertilizers, etc.. Free from all tainting.
For instance here is a list of Non Organic Ingredients allowed in Organic foods: Sourced from http://foodbabe.com/2012/05/24/full-list-of-non-organic-ingredients-allowed-in-organic-food/
Non-Organic Agriculture Products Allowed:
- Casings, from processed intestines.
- Celery powder.
- Chia ( Salvia hispanica L. ).
- Colors derived from agricultural products.
- Annatto extract color—water and oil soluble.
- Beet juice extract color
- Beta-carotene extract color, derived from carrots
- Black currant juice color
- Black/Purple carrot juice color
- Blueberry juice color
- Carrot juice color
- Cherry juice color
- Chokeberry—Aronia juice color
- Elderberry juice color
- Grape juice color
- Grape skin extract color
- Paprika color —dried, and oil extracted.
- Pumpkin juice color
- Purple potato juice
- Red cabbage extract color
- Red radish extract color
- Saffron extract color
- Turmeric extract color
- Dillweed oil
- Fish oil —stabilized with organic ingredients or only with ingredients on the National List
- Fortified cooking wines.
- Marsala.
- Sherry.
- Fructooligosaccharides
- Galangal, frozen.
- Gelatin
- Gums—water extracted only (Arabic; Guar; Locust bean; and Carob bean).
- Hops ( Humulus luplus ).
- Inulin-oligofructose enriched
- Kelp—for use only as a thickener and dietary supplement.
- Konjac flour
- Lecithin—de-oiled.
- Lemongrass—frozen.
- Orange pulp, dried.
- Orange shellac-unbleached
- Pectin (high-methoxy).
- Peppers (Chipotle chile).
- Seaweed, Pacific kombu.
- Starches.
- Cornstarch (native).
- Rice starch, unmodified —for use in organic handling until June 21, 2009.
- Sweet potato starch—for bean thread production only.
- Tragacanth gum
- Turkish bay leaves.
- Wakame seaweed ( Undaria pinnatifida ).
- Whey protein concentrated
Here's a list of synthetic ingredients allowed in "organic foods" sourced from http://foodbabe.com/2012/05/24/full-list-of-non-organic-ingredients-allowed-in-organic-food/
Synthetics Allowed:
- Acidified sodium chlorite—Secondary direct antimicrobial food treatment and indirect food contact surface sanitizing. Acidified with citric acid only.
- Activated charcoal —only from vegetative sources; for use only as a filtering aid.
- Alginates.
- Ammonium bicarbonate—for use only as a leavening agent.
- Ammonium carbonate—for use only as a leavening agent.
- Ascorbic acid.
- Calcium citrate.
- Calcium hydroxide.
- Calcium phosphates (monobasic, dibasic, and tribasic).
- Carbon dioxide.
- Cellulose—for use in regenerative casings, as an anti-caking agent (non-chlorine bleached) and filtering aid.
- Chlorine materials—disinfecting and sanitizing food contact surfaces, Except, That, residual chlorine levels in the water shall not exceed the maximum residual disinfectant limit under the Safe Drinking Water Act (Calcium hypochlorite; Chlorine dioxide; and Sodium hypochlorite).
- Cyclohexylamine —for use only as a boiler water additive for packaging sterilization.
- Diethylaminoethanol —for use only as a boiler water additive for packaging sterilization.
- Ethylene—allowed for postharvest ripening of tropical fruit and degreening of citrus.
- Ferrous sulfate—for iron enrichment or fortification of foods when required by regulation or recommended (independent organization).
- Glycerides (mono and di)—for use only in drum drying of food.
- Glycerin—produced by hydrolysis of fats and oils.
- Hydrogen peroxide.
- Magnesium carbonate—for use only in agricultural products labeled “made with organic (specified ingredients or food group(s)),” prohibited in agricultural products labeled “organic”.
- Magnesium chloride—derived from sea water.
- Magnesium stearate—for use only in agricultural products labeled “made with organic (specified ingredients or food group(s)),” prohibited in agricultural products labeled “organic”.
- Nutrient vitamins and minerals, in accordance with 21 CFR 104.20, Nutritional Quality Guidelines For Foods.
- Octadecylamine —for use only as a boiler water additive for packaging sterilization.
- Ozone.
- Pectin (low-methoxy).
- Peracetic acid/Peroxyacetic acid —for use in wash and/or rinse water according to FDA limitations. For use as a sanitizer on food contact surfaces.
- Phosphoric acid—cleaning of food-contact surfaces and equipment only.
- Potassium acid tartrate.
- Potassium carbonate.
- Potassium citrate.
- Potassium hydroxide—prohibited for use in lye peeling of fruits and vegetables except when used for peeling peaches during the Individually Quick Frozen (IQF) production process.
- Potassium iodide—for use only in agricultural products labeled “made with organic (specified ingredients or food group(s)),” prohibited in agricultural products labeled “organic”.
- Potassium phosphate—for use only in agricultural products labeled “made with organic (specific ingredients or food group(s)),” prohibited in agricultural products labeled “organic”.
- Silicon dioxide.
- Sodium acid pyrophosphate —for use only as a leavening agent.
- Sodium citrate.
- Sodium hydroxide—prohibited for use in lye peeling of fruits and vegetables.
- Sodium phosphates—for use only in dairy foods.
- Sulfur dioxide—for use only in wine labeled “made with organic grapes,” Provided, That, total sulfite concentration does not exceed 100 ppm.
- Tartaric acid—made from malic acid.
- Tetrasodium pyrophosphate (CAS # 7722–88–5)—for use only in meat analog products.
- Tocopherols—derived from vegetable oil when rosemary extracts are not a suitable alternative.
- Xanthan gum
Can you believe it? That's why I said, check your labels!!
Here's a resource for your continued research on this subject.
http://www.safecosmetics.org/get-the-facts/chemicals-of-concern/
Image of phenoxyethanol sourced from http://www.ewg.org/skindeep/ingredient/704811/PHENOXYETHANOL/
Lots of love,
Heavenly Botanicals
~Brie
Apple Cider Vinegar Toner: A gentle daily Chemical peel! April 2, 2015 10:56


Most people view vinegar as something only used for cooking and maybe a few for cleaning, but I'm going to tell you why Raw unpasteurized Apple Cider Vinegar is a perfect match for your skin!
First, let me ask you a few questions:
Do you have red, blotchy, rash prone skin?
Does your skin itch or feel irritated on a daily basis?
Do you break out easily and frequently?
A couple of years ago I could've answered yes to all of these questions and if that's you, then listen up!
Your acid mantle has probably been compromised.
What is your acid mantle?
The acid mantle is your skin's protection barrier. It protects you from sun and environmental damage (chemicals, pollution, etc.). The more alkaline your skin becomes the more acne, blemishes, allergies, rashes etc. you will have. This is why balancing the acid mantle is super important and why you shouldn't use face washes or anything on your face that is not pH balanced! For example most soaps have an alkaline pH which breaks down the acid mantle making your skin more vulnerable to damage.
So go now and look at your face wash, does it say pH balanced? If not, throw it out, it's wreaking havoc on your face!
Why apple cider vinegar (ACV)? Short answer: it's like a gentle daily CHEMICAL PEEL!
**********************************************
ACV contains acetic acid, lactic acid, citric acid and malic acid as well as vitamins, minerals and amino acids, all essential building blocks for healthy skin. You know those really expensive chemical peels you need to go to an esthetician to get? Well using ACV on your face is like getting that chemical peel but it's much more gentle, there are no chemicals, and you won't peel! You will see a glowing difference in your skin from using this on a daily basis!
ACV also lightens dark spots and acne scars!
Now that you have this information find yourself a gentle, pH balanced face wash and an apple cider vinegar toner. You can make it yourself, if you're a DIY-er, it's quite easy!
Recipe:
1 Tbsp ACV ( I recommend Bragg's Unpasteurized Organic ACV)
3-4 TBSP Water
Mix the ACV and water and apply it to your face with a cotton ball or paper towel, or whatever you prefer to use, just make sure it's clean!
NOTE: You will not get the same results with a pasteurized ACV because many of the healing components have been compromised/altered in the pasteurization process.
If you'd rather just buy an ACV toner I make and sell them here
https://www.heavenly-botanicals.com/collections/organic-face-wash/products/purify-toner-witch-hazel-toner-calendula-yellow-dock-plantain-yarrow-acne-toner-cystic-acne-toner-cystic-acne-skin-care
All of my Organic Raw Unpasteurized ACV toners are infused with herbs organically sourced, wild harvested or grown on my farm (gardening is my other passion!).
Other benefits of ACV, when take internally (note my toners are for external use only!):
Helps control weight
Helps control the yeast balance in your body
Helps maintain healthy skin
Promotes digestion, especially in those with low stomach acid
Helps detox your body (if you're prone to yeast infections try drinking it daily, 1 tbsp in 8 oz of water a couple times a day).
Other ways to use ACV:
Prevent or treat Yeast infections- if you're prone to yeast infections try drinking it daily, 1 tbsp in 8 oz of water a couple times a day
Also try putting in a bath for yeast infections (1 cup per bath)
Bake with it! Yes if you're a gluten free baker and you often have dense baked goods results then try this awesome fix, substitute your baking powder or rising agent for 1 TBSP ACV and 1 tsp Baking soda. You may need to play around with the measurements depending on how big a batch you're making but I usually use this proportion for a cake recipe that uses 2 cups of flour. I will be posting some recipes in the future so check back!)
It can also be used as a hair rinse for silky soft hair. It will cleanse your hair of build up from hair products and close the hair shaft, reducing frizz and increasing shine!
Recipe:
1-2 TBSP ACV
1/2- 1 cup of water

What other Natural Ingredients can be used for an at home skin peel?

Several fruits contain natural enzymes and acids that can help to exfoliate the skin and provide similar benefits to a chemical peel. Here are a few examples:
- Pineapple: Pineapple contains an enzyme called bromelain, which can help to break down and dissolve dead skin cells, revealing brighter, smoother skin.
- Papaya: Papaya contains papain, an enzyme that can help to exfoliate the skin and improve its texture. It also contains vitamin C, which can help to brighten the skin.
- Lemon: Lemon contains citric acid, which is a natural exfoliant. It can help to remove dead skin cells and lighten dark spots and hyperpigmentation.
- Strawberry: Strawberries contain salicylic acid, which is a beta-hydroxy acid (BHA) that can help to exfoliate the skin and unclog pores. They also contain vitamin C, which can help to brighten the skin.
- Kiwi: Kiwi contains vitamin C and alpha-hydroxy acids (AHAs) that can help to exfoliate the skin and improve its texture.
To use these fruits on your skin, you can mash them up and apply the pulp directly to your skin as a mask or mix with yogurt or honey to dilute. However, it’s important to patch test first and avoid using these ingredients if you have sensitive skin or allergies to any of them.
FDA Disclaimer: These statements have not been evaluated by the FDA and are not intended to treat, cure, diagnose or prevent any disease.